Connect conveyor belts, power and the hay sell stand
Updated 2026-09-27
On this page
For a first working route, connect the hay supply to its destination, confirm power where needed, then send material through before adding another branch. Demo V8 added snapping at the Hay Sell Stand, F for No Snap mode and an E interaction at power poles to shut down the grid. Those details are useful when a line looks connected but will not run.
Connect the sale end first
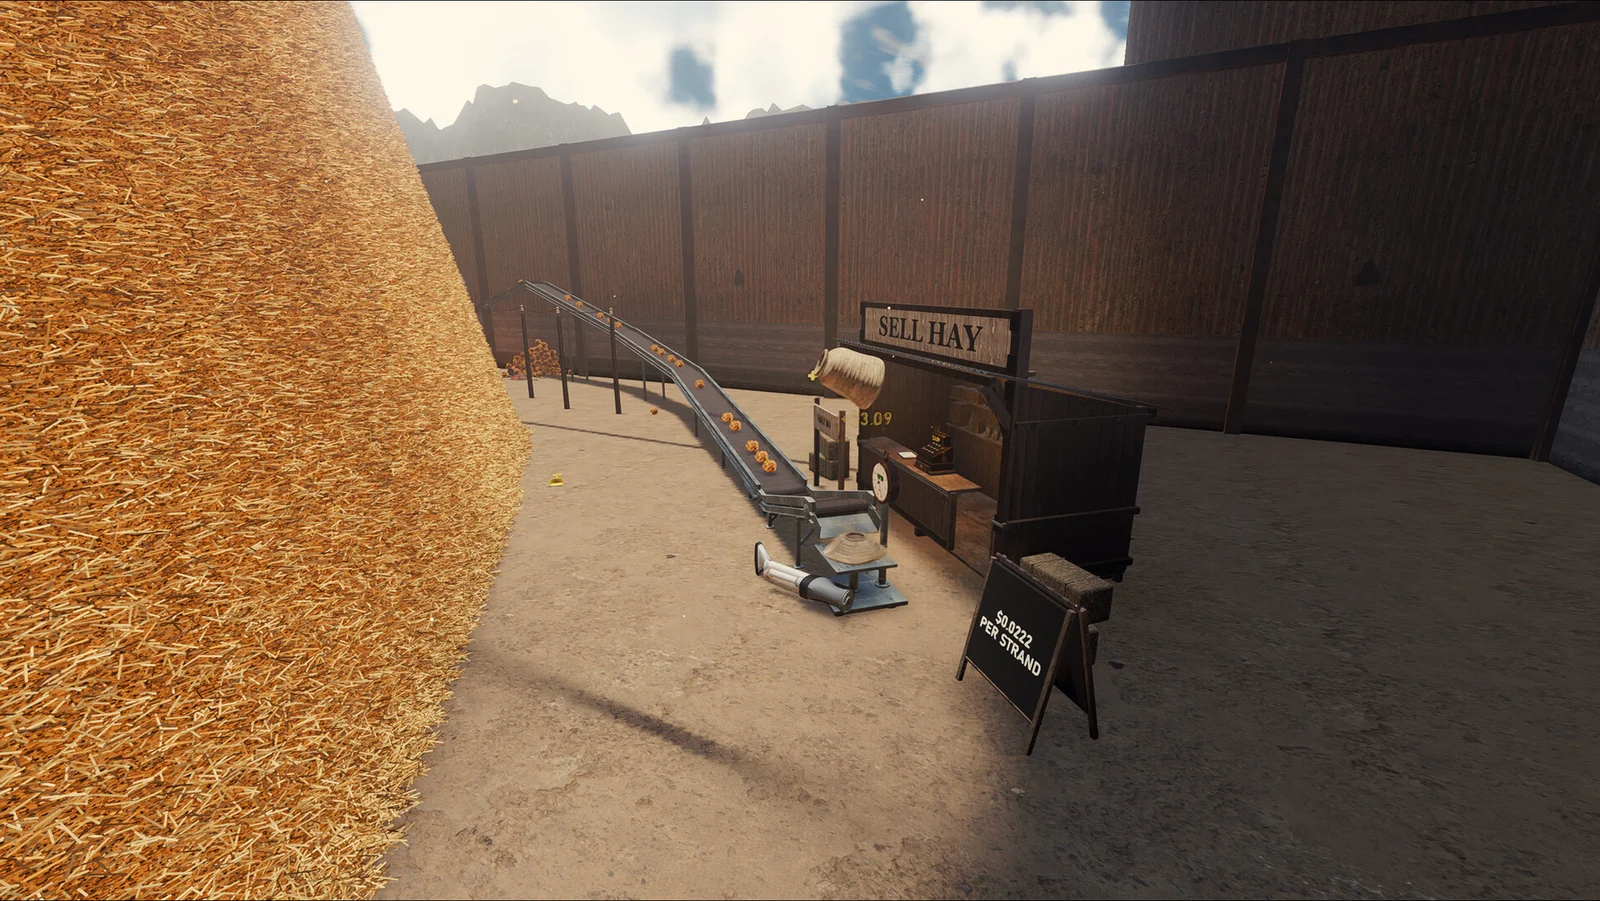
The destination in this official screenshot is the SELL HAY stall. The V8 update added belt snapping there and reworked conveyor placement with automatic pathfinding.
- Identify the selling point and leave room to approach it.
- Place the final belt section using the sell stand's snap connection.
- Connect upstream toward the supply or machine output you want to carry.
- Feed a small batch and follow it all the way to the sale point. Check that the money display changes.
If placement keeps snapping where you do not want it, F activates No Snap mode, according to the V8 notes. Use the in-game mode indicator and prompts when switching placement behavior. Free placement is useful for layout control; it does not prove that two endpoints actually connect, so test material flow afterward.
When powered machines stop together
Before replacing machines, check the shared electricity supply. V8 lets you shut down the entire power grid by pressing E at a power pole. If several machines stopped after you interacted with a pole, inspect the grid state first and follow the pole's current prompt to restore it.
The same update added a visual notice when power is below the required level. A belt delivering hay to a machine does not establish that the machine has enough power. Read the electricity indication before changing your material route.
Find the first point where hay stops
| What you observe | Check next |
|---|---|
| The input belt is empty | Follow the route back to the collector or preceding machine. |
| Hay arrives but the next machine stays idle | Check electricity, the required input and the machine's output path. |
| A queue builds in front of a scanner | Watch whether the scanner processes material more slowly than it arrives. |
| Material reaches a junction but misses its destination | Trace each outgoing branch separately, including any route to the sell stand. |
These checks help isolate a fault; they are not promises that every stalled machine has the same cause. On the Pellet Disc Machine, V8 added BRICKS / HAY resource indicators, so inspect those instead of assuming a visually full belt supplies everything it needs.
Expand without bypassing the needle check
V8 introduced U-Splitters and U-Joiners. Players discussing scanner congestion have also suggested splitting into separate scanner lanes and joining the output afterward. That is a community layout suggestion, not a measured throughput guarantee. Test each lane before copying it across the factory.
If the goal is to check every product for needles, trace every path to the sale point through your scanning setup. A tidy main line does not help if another branch bypasses it. See needles and scanners for the developer's explanation of needles inside hay products.
Sources: official Demo V8 notes, September 11, 2026 UTC, community scanner discussion. Check your current build's prompts if controls differ.
Related guides
Demo updates: what V8 changed and what to check
A practical summary of Demo V8 belt, power and performance changes, with dated official news and the planned full-game release.
Find the Needle demo: download, saves and PC requirements
Install the official Steam demo, find and back up its Windows save folder, and check requirements and full-game release plans.
Getting started: hay, tools and your first upgrades
Learn the manual collection loop, read the research tree and choose between better tools, transport and your first powered line.
Tools, machines and hay products explained
Separate collection, transport, processing and needle detection, then check what a new machine needs before buying it.